Getting Connected at Penn State
Instructions to access Penn State wireless for for Windows 7, 8, & 10, and Mac OSX.
Instructions for Windows 7,8,10 using SecureW2--Setup
- Choose psuwirelesssetup from the available wireless networks
- Download the pertinent file from http://bit.ly/1Del7x
- Run the Penn State Wireless V2 installer
- Click Yes when prompted by User Account Control
- Click Setup
- Click OK to install in English, or select a language and click OK
- Click Next
- Read the SecureW2 License Agreement and click "I Agree"
- Select EAP-‐TTLS and click Install
- You must reboot in order to connect to Penn State Wireless 0. Leave "Reboot now" selected and click Finish. Your machine will reboot
Instructions for Windows 7,8,10 using SecureW2--Connection
- To connect to the psu wireless network manually, right click on the Wireless Icon
 in the system tray and click "Connect to a Network.”
 - Select psu from the network list and click Connect.

- The SecureW2 Logon Dialog Window will appear. Enter your Penn State Access Account User-‐ID and Password. Domain must be left blank. Click OK

You're now connected to Penn State Wireless 2.0. You can now open a web browser and use the Penn State Wireless Service.
Setup Mac OSX
- Choose psuwirelesssetup from the available wireless networks
- Downloadthe pertinent file from http://bit.ly/1Del7x
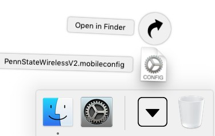
- Double-‐Click the downloaded file

- Click Continue to install

- Enter your Access Account User-‐ID and password

- Enter your machine’s local user ID & password

- The profile is now installed. Wireless for PSU is configured

- To access the wireless, please connect to the psu network

You're now connected to Penn State Wireless 2.0. You can now open a web browser and use the Penn State Wireless Service.
